Welcome to Kingdom Hearts II Final Mix! The beginning of the game serves as a tutorial that allows you to familiarize yourself with the controls, actions, and gameplay.
Basic Controls
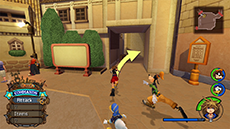
When you gain control of Roxas, tilt the left analog stick slightly to walk, and tilt it harder to run. You can also jump with the  button and grab the edge of buildings to pull yourself up. Walk forward to the Armor Shop to proceed.
Reaction Commands
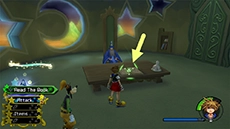
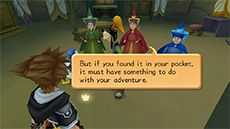
Reaction commands are used to execute different actions depending on your situation. You can use them to talk to NPCs, open treasure chests, and gain the upper hand in combat. Approach the Accessory Shop and use the Talk reaction command.
Camera & Lock-On
Move the camera with the  right stick. Press the
  R3 button to return it to its default position. Pressing
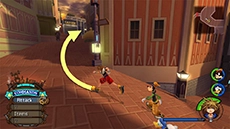
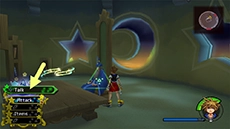
  will allow you to lock on to specific things. When locked on to something, the camera will automatically follow the target. Press to lock onto the cat on top of the candy shop.
Stat Bonus Selection
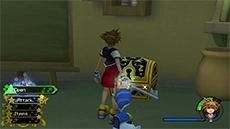
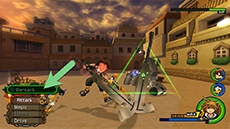
After encountering Seifer and his gang, Roxas must select a Struggle weapon using the Pick It Up reaction command. You can only pick one weapon, and each gives a unique bonus. The choice you make here does NOT affect your stat growth throughout the game, but instead gives you an early boost in whichever stat you choose.
Combat Basics
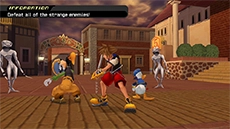
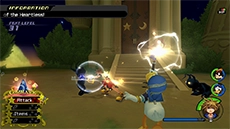
The green gauge in the bottom right corner is your HP gauge - if this reaches zero, it's game over. The blue gauge is your MP gauge - magic will become available at a later time. Whenever you approach a target in combat, you'll see a yellow reticle appear. Press the  button repeatedly to attack Seifer.
Follow the Thief
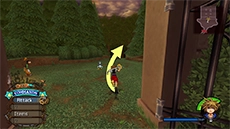
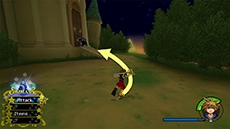
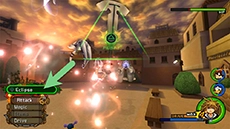
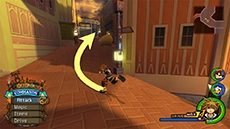
Follow the white creature through the woods, travelling northwest from your starting position until you reach the old mansion. Approach the creature and use the Capture reaction command.
Attempt to strike the creature by pressing the button repeatedly. After about 12 strikes (or after Roxas loses enough HP), the struggle weapon will transform into a strange key. You can now deal damage to the creature and defeat it with 5-7 hits.
After defeating enemies, orbs will drop - be sure to grab the green ones to restore your HP and the yellow ones to earn Munny. After a series of cutscenes, the game will progress to the second day.

Saving Your Progress
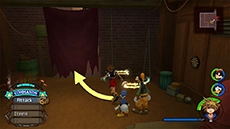
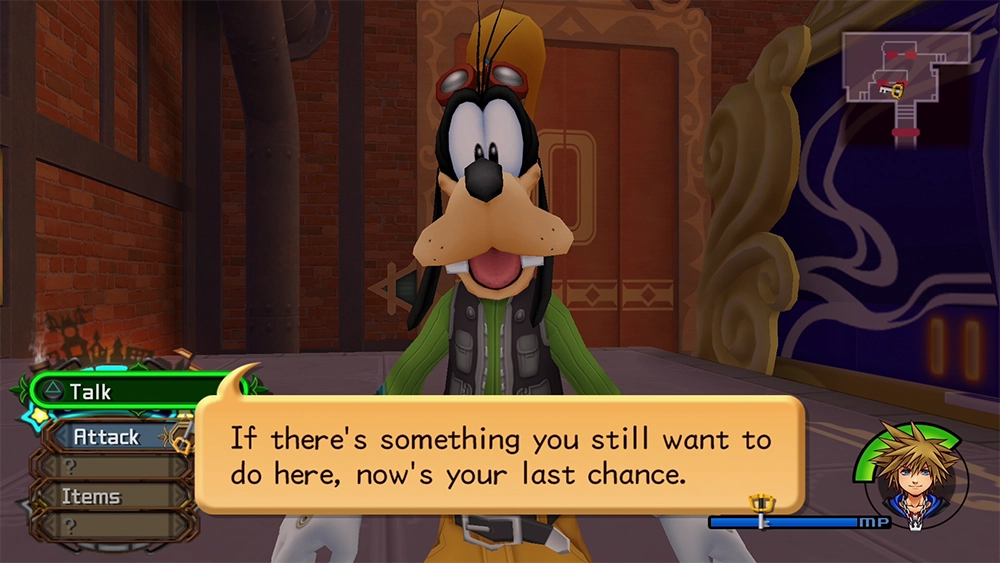
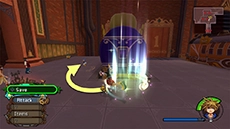
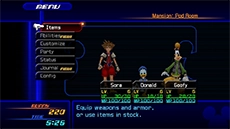
When you gain control of Roxas on the second day, approach the swirling light in front of him to access the Save menu. Kingdom Hearts II Final Mix does NOT have an auto-save feature, so it's wise to save at these stations as often as you see them.
Odd Jobs in Station Heights
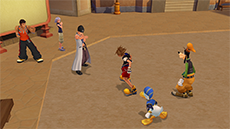
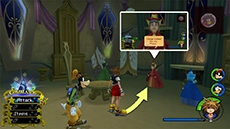
After saving your progress, Roxas will exit the usual spot and receive the Twilight Town Map. Travel uphill and to your left to reach Market Street. Roxas is tasked with earning 800 Munny by taking on odd jobs posted on Market Street. Select Apply For Work at the "HELP WANTED" board in front of Roxas.
 |
|
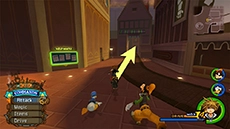
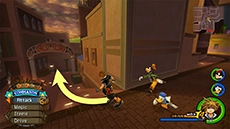
Move on the skateboard with the  left stick to approach targets, then use the Deliver reaction command when it appears. Your targets in the order they appear: left stick to approach targets, then use the Deliver reaction command when it appears. Your targets in the order they appear:
- Boy in a green shirt, in front of Roxas's starting position
- White bird flying in a wide circle halfway down the hill
- Man in a green shirt walking near the "HELP WANTED" sign
- White bird flying between the two shops, use the Grind reaction command near the ramp railing to make Roxas jump towards the bird
- Woman walking in the lowest corner of Market Street, across from the shops
REWARD: 50 Munny (Under 20 seconds) • 30 Munny (20-59 seconds) • 10 munny (1 min +)
|
 |
|
Use the button to strike the cargo and push it up the hill.
- Jump and use complete air combos (3 hits) to push the cargo more quickly
- When the cargo flies up, strike it once during the air to give it a big push forward
- The cargo can fall on Roxas while it's in the air, so be careful
REWARD: 50 Munny (Under 30 seconds) • 30 Munny (30-59 seconds) • 10 munny (1 min +)
|
 |
HELP WANTED: GrandstanderHELP WANTED: Grandstander |
|
|
|
Odd Jobs in Tram Common
You can also travel to Tram Common through the passage at the bottom of Station Heights and Apply For Work at three additional odd jobs from the "HELP WANTED" board in the center of the area.
 |
|
Search for available areas and press  to put up 20 posters. to put up 20 posters.
- Use the Post reaction command when near a yellow square to post a poster
- Press the button repeatedly when there are three poster areas grouped together
- You can Jump on the trolley in the southwest corner to reach another set of three poster spots
- Refer to the map below to plan the most efficient route to poster spots
REWARD: 100 Munny (1'30" or less) • 50 Munny (1'31" - 1'59") • 30 munny (2min +)
|
 |
|
Get rid of the swarms of bees by attacking with the button.
- The clusters of bees will charge toward Roxas a moment after they stop moving
- You can jump toward the bee swarms and attack with air combos
- Each swarm of bees take two hits to dissipate
REWARD: 50 Munny (20 seconds or less) • 30 Munny (31 - 59 seconds) • 10 munny (1min +)
|
 |
|
Get rid of all the junk in the area by attacking with the button.
- When hitting the junk, try to aim it toward other piles
- You can move Roxas toward the junk to push the pieces together, allowing you to hit more at once
- The fewer swings you take to clear the junk, the more munny you'll make
REWARD: 50 Munny (10 or fewer swings) • 30 Munny (11-15 swings) • 10 munny (16+ swings)
|
Bring Munny to the Station
When you've earned enough Munny, travel to the top of Station Heights and enter Station Plaza. Talk to Hayner and select "Nah, I've earned enough." Roxas will receive the Munny Pouch. After a series of cutscenes, the game will progress to the third day.

The Girl in White
Save your game in the Usual Spot and exit to the Back Alley. Travel uphill to the left to reach Market Street. After a series of cutscenes, Roxas will arrive in the Sandlot and must defend against the mysterious creatures.
Roxas cannot damage the creature with the Struggle weapon, but you can use Reversal to confuse the creature. The fight will end when you have lost enough HP or swung the Struggle weapon near the creature about ten times. After a cutscene, Roxas will be teleported to the Station of Serenity.
Dream Weapon Selection
Roxas is presented with a sword, a shield, and a staff; you are required to choose one as your power. Your choice of weapon will determine the order in which you learn certain Abilities. Approach your desired weapon and Take It - choose "You bet it is!" to confirm your selection.
After choosing a dream weapon, the mysterious creatures approach Roxas. Use Reversal to confuse them, then strike with the Keyblade. You can keep them from attacking by using Reversal, striking twice, then using the reaction command again. Defeating the final creature will earn Roxas the Aerial Recovery ability.
Treasure Chests & Items
Approach the treasure chest and Open it to receive a Potion. Equip your new ability in the menu and save your progress at the save station, then proceed through the door into the next area.
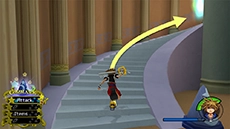
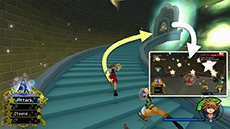
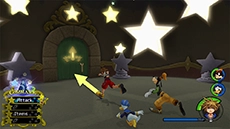
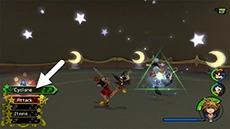
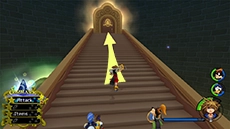
Ascend the stairs and defeat the enemies you encounter along the way. You can open the chest on the green station to receive another Potion. Traveling through the door on the last platform will trigger your first boss battle, so don't forget to equip your Potions in the menu beforehand (your items lots will autofill with the most recently obtained item if the slot is empty).
 |
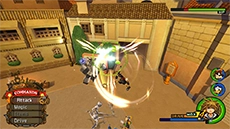
HP: 300 DIFFICULTY: 
At the start of the fight, Twilight Thorn will perform several staged sequences - use the Key Counter Lunarsault Break Raid reaction commands when they become available to damage and daze it. Attack with complete combos while it's dazed; perform a short jump before your combo to deal hits more quickly.
When it recovers, use the Reversal reaction command to dodge its vines and reach its head; attack with complete air combos when you're close enough. Back away and use your jump to evade its arms at ground level. When it lowers its head and arms, run to the edge of the platform near its feet to avoid the vines, and use complete ground combos to defeat the lesser enemies (they drop large HP orbs that can help you recover quickly). Use the Reversal reaction command whenever you see it send out vines.
When its HP gets low, it will form a pulsing bomb above the center of the platform. Use the Reversal reaction command to avoid the vines and use complete air combos on its head as quickly as possible. You can avoid the resulting blast by hugging the edge of the platform.

REWARD: Maximum HP Increased, Roxas learns the ability Guard
|

Sparring with Seifer
When you regain control of Roxas, you can travel to the Back Alley and Talk to Seifer in order to spar with him. Fighting Seifer is your only opportunity to earn EXP at this time; he yields 13 EXP per win. If you wish to fight Seifer again, exit and reenter the Back Alley in order to reset the room, then talk to Seifer.
Let's Struggle!
When you are ready to continue, return to the Sandlot and save your progress at the save station in the northeast corner. Talk to the man near the bracket board in the northwest corner and select "I'd better listen." Here's a recap on how to Struggle and a few extra tips:
- Both contestants start with 100 orbs each. Striking your opponents will cause them to drop orbs.
- Move Roxas to pick up the orbs while remaining aware of where/when your opponent attacks.
- Whichever contestant has more orbs in their possession when the timer runs out wins the match.
- If a contestant picks up all 200 orbs, the match will end immediately and confirm that contestant as the winner.
- When your opponent's HP reaches zero, they will be dazed for a short time, allowing you to pick up dropped orbs.
After hearing the rules, Talk to the promoter in the center of the ring and select "I'm ready! Let's get started!"
 |
|
HP: 210 EXP: 0 DIFFICULTY: 
Hayner likes to approach Roxas and strike with a two-hit combo (a downswing, then an upswing). Staying just outside of his range will give you the time needed to close in afterwards and deal a complete combo. If you're hit by his first downswing, you can avoid his following upswing by standing still (if you try approaching after taking the first hit, you'll always get hit by the upswing).
If you're struck by the upswing and launched into the air, use your Aerial Recovery ability to regain your footing quickly. Hayner also has a forward thrust attack that covers some distance; move to his sides to avoid it, then follow up with a complete ground combo.
Always strike from the ground; air combo finishers cause Hayner to recover more quickly, leaving you open to attack. You can Guard against Hayner's attacks, but he recovers quickly; it's better to side-step to avoid his attacks to take advantage of longer openings.

REWARD: None
|
After winning the match against Hayner, Save your progress at the nearby save station and speak to the tournament promoter again to start the next match against Vivi.
 |
|
HP: 105 EXP: 0 DIFFICULTY:
Vivi starts the match with a taunt for the first two seconds, during which you can strike with a complete ground combo. He's open to damage between most of his attacks, and especially when he sways back and forth while holding his struggle bat upwards. You can use Guard to deflect his downward swing attack and leave him staggered for long enough to deal a complete ground combo.
He will retaliate immediately after taking two complete ground combos in quick succession, so it's best to only deal one full combo at a time. You can avoid Vivi's spinning uppercut attack by moving to his sides or using Guard to deflect it; either way, be sure to stay close after this attack so that you can deal a combo just afterwards. If you're struck by the uppercut and launched into the air, use your Aerial Recovery ability to regain your footing quickly.
Vivi's strongest attack is a combo consisting of two spinning strikes, followed by a forward jab. You'll know when he's about to use it when he cartwheels to the outer perimeter of the area and his struggle bat gets larger. Use Guard to deflect, or keep your distance to avoid the attack altogether.
REWARD: None
|
After defeating the fake Vivi, three of the strange white creatures appear; use Reversal and ground combos to take them out. When the fight is over, a hooded figure approaches Roxas and challenges him.
 |
|
HP: 105 DIFFICULTY: 
Axel often attacks using a two-hit combo with his chakrams; you can Guard against the attack to stagger him, but it's not a long enough stagger to land a complete combo, so it's better to side-step this attack to avoid it. Axel is always vulnerable while he is side-stepping; be sure to lock on and strike him during this moment.
When Axel crouches down for a couple of seconds, he will quickly dash to either side of Roxas and attack with his flaming chakrams; it's difficult to run out of range of this attack in time, so it's better to use the Guard ability as Axel approaches to deflect the attack. Axel will either side-step or use his two-hit combo after this attack, so be ready to move or attack accordingly.
When he surrounds himself in flames and says "don't make me mad!", keep your distance to avoid his flurry of chakram throws, or use Guard to deflect them. If you're close to him at the end of this attack, he may side-step - giving you another opportunity to deal a complete ground combo.
REWARD: Roxas learns the ability Scan
|
After the cutscene, open the menu and activate your newly-acquired Scan ability, then save your progress at the nearby save station. If you're ready to face Setzer, Talk to the tournament promoter in front of Roxas and select "I'm ready! Let's get started!"
 |
|
HP: 105 EXP: 0 DIFFICULTY:
Setzer starts the match with a taunt for the first two seconds, during which you can strike with a complete ground combo. He's open to damage between most of his attacks, and especially when he takes two short hops backwards. You can use Guard to deflect his single horizontal strike and leave him staggered for long enough to deal a complete ground combo.
When he puts up a guard, you can attack to force him to retaliate. As long as you strike from the ground, his upswing won't make contact with Roxas - this will give you another opportunity to strike with a complete ground combo. When half of his HP is depleted, Setzer may start countering with a spinning aerial strike after taking damage from a combo finisher; you can run away to avoid it, or use Guard to deflect it. I prefer guarding because it places Setzer near you for an opportunity to deal a ground combo.
When Setzer recovers after his HP is fully depleted, he will start using a series forward jabs in quick succession that track Roxas. You can run to the sides to avoid the attack, or Guard against it to stagger Setzer, leaving him open to a complete ground combo. Use Aerial Recovery if you're sent into the air by Setzer's attacks.
REWARD: Medal (lose the match) Champion Belt (win the match)
|
After the championship match against Sezter, Roxas will receive "The Struggle" Trophy. Several cutscenes will play and the game will progress to the next day.

The Seven Wonders of Twilight Town
Save your progress at the nearby save station and exit The Usual Spot. If you wish, you can travel to the Sandlot and spar with Seifer to earn 13 EXP per win.
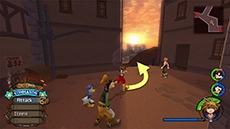
When you're ready to proceed, travel uphill through the Back Alley and Market Street to reach Station Plaza. Entering Central Station will trigger the next cutscenes and bring Roxas to Sunset Station.
Descend the steps to reach Sunset Terrace. Roxas is tasked with investigating the "seven wonders of Twilight Town." You can Talk to Pence to view a list of the remaining "wonders" to investigate.
The Friend from Beyond the Wall
Travel to the alley leading to a dead-end in the northeast and Investigate the back wall. Large balls will start flying out of the wall towards Roxas. Move Roxas down the alley and avoid the incoming balls by moving left or right. The patterns are randomized, but there are several combinations that you'll see often.
You can use the Guard ability to deflect the balls back toward the wall; any incoming balls behind the one you blocked will be sent back as well. When you reach the back wall, use the Hit reaction command to finish your investigation.
The Moans from the Tunnel
Travel up the north ramp and Investigate the tunnel entrance. Copies of Vivi will start to appear and attack Roxas. Each copy will disappear after taking one hit, do use ground combos to clear out the Vivis; their moveset matches Vivi's attacks from the Struggle match against him.
As you defeat the Vivi copies, more will appear around the area. You can Guard against their attacks, but the sheer number of them make it ineffective to deflect attacks. Continue striking the copies until they no longer appear in order to complete the investigation.
The Doppelganger
Exit the tunnel and travel to the alcove in the southwest corner of Sunset Terrace. Investigate the waterfall - a dark illusion of Roxas will appear to challenge him.
The Shadow Roxas usually attacks toward Roxas with complete ground combos; you can strike it between its combos with complete ground combos of your own. You can Guard against its attacks, but it won't stagger with every deflection. Continue striking the Shadow Roxas until its HP is depleted in order to complete the investigation.
The Animated Bag
Travel up the steps in the far west and through the open passageway to reach Sunset Hill. Climb the hill to the top and Investigate the bag. The bag will start to move around the area on its own.
Approach the moving back and use the Jump On reaction command - the STAMINA bar will deplete while Roxas is riding on top of the bag. When the bag approaches one of the trash bins, use the Jump reaction command to hop over the bin. Roxas will fall off of the bag if he strikes a trash bin. The investigation will end when the STAMINA bar is fully depleted.
The Ghost Train & The Girl at the Manor
After investigating all four available "wonders" in Sunset Terrace, return to Sunset Hill to trigger the next cutscenes. Travel through Market Street to Tram Commons and into the Woods to reach the Manor. Several cutscenes will play and the game will progress to the next day.

To the Mansion
When you regain control of Roxas, Save your progress at the nearby save station and exit The Usual Spot. After a short cutscene, Axel will appear and summon a group of creatures to attack you. Use the Reversal reaction command to stagger the creatures, making it easier to strike them.
NEW NOBODIES: Dusk, Assassin
After the first wave of creatures are defeated, a new type of creature appears; this creature likes to linger under the ground where it can't be reached. Wait until it jumps out of the ground to strike it, or use Guard to deflect its swipe attacks to force it above ground. It can also dash toward you and explode, so be wary!
Travel north down the steps to the Sandlot, then continue to Tram Common and through the Woods area to reach the Old Mansion.
After the cutscene in front of the mansion, Roxas will enter the Foyer. Ascend the left stairwell and enter the room at the end of the southwest hallway to trigger another cutscene; Roxas will obtain Naminé's Sketches and the Mansion Map. Save your progress at the nearby save station and exit The White Room.
Travel across the second floor to the other side of the mansion and pass through the door at the end of the hallway. After the short cutscene, descend the stairs and travel through the open passageway. Equip any armor (either Medal or Champion Belt) and accessories (only Ability Ring at this point) to Roxas, and be sure to equip Potions in available slots. When you're ready to proceed, Save your progress at the nearby save station and travel through the passageway on the other side of the lab.
Defeat the group of four Dusk with ground combos, using Reversal to halt their movements periodically. A second wave consisting of a Dusk and two Assassins will then appear; focus on one of the Assassins until defeated, and keep an eye out for the other two enemies. After the creatures are defeated, Axel appears and confronts Roxas.
 |
|
HP: 105 DIFFICULTY:
When the fight begins, Axel will ignite the entire floor; making contact with it will damage you periodically. If you get too close to the outer walls, large pillars of flame will erupt from them and damage you if you’re close enough, so try to keep Roxas at least a few steps inside of the walls when navigating around Axel’s attacks.
Just like in the first fight, Axel is open to damage when he sidesteps. Continue your combo until you send Axel into the air; then use the Overtaker and Clear Light reaction commands to damage him and clear the floor. Roxas dual-wields in this fight, allowing you to start combos with the attack or guard button. The guard button combo is shorter and takes less time to volley Axel into the air, so use that option when the floor is still ignited to gain access to the reaction commands more quickly.
After using the reaction commands to clear the floor, use a standard attack combo and keep striking until Axel jumps behind the walls of flame. Whenever he jumps out of the arena, quickly use your lock-on to locate where Axel will jump out from. If the target is near ground level, you can move to the sides to avoid his sliding dash attack, and if the target is high up, you can jump at the right time to avoid the shockwave when Axel lands. If you instead place Roxas directly in the line of fire for either of these attacks, you can use the Burst Frontier reaction command to break his attack loop and deal damage. If the floor is ignited, you can follow up Burst Frontier with Overtaker and Clear Light to clear the floor again. And you can also stagger Axel out of his ground-level slide attack if you use the short combo by pressing the guard button with good timing. If left uninterrupted, Axel will jump back and attack through the flames three times in a row in phase one, and five times in phase two.
When about half of Axel’s HP is depleted, he can use his desperation move: when you hear Axel say “You won’t forget this!”, he will attack with a flurry of chakram throws, a forward charge, and a line of flame pillars. This attack is difficult to avoid, and especially so because dual-wielding Roxas can’t guard against attacks. If he starts this attack near the outer walls, you may be able to avoid most of his strikes by waiting on the opposite side of the arena. I also had some luck dodging the entire attack by jumping towards him and using an air combo to deflect his chakrams. If you need to use a Potion to restore your HP, keep in mind that you can use an item in the middle of your combo while you have Axel staggered.

REWARD: Maximum HP Increased
|
After Axel disappears, travel through the door in the southwest corner. After a short cutscene, you can open the treasure chest on your right for a Hi-Potion, then enter through the next door to proceed with the story.

 button!