| x37 | x4 | x4 |
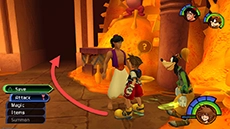
Heartless will appear as soon as you arrive in Agrabah. If you need a quick place to save your game, there's a save station in the Storage room - you'll find this room through the small wooden door to the left of Sora's starting position. Travel through the open passage in front of you to reach the main street, then enter the house labeled "???" by climbing the wooden pole around the corner on your right.


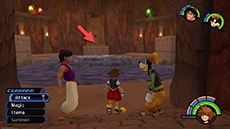
The Heartless have pinned down a magic carpet under a dresser in this house; Move the dresser to free the magic carpet, then exit the house by jumping down from either corner of the room. Enter the alley, located through the passage across from the house you were just in.


Sora will encounter
Find Aladdin
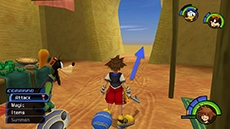
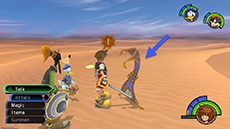
After defeating the Heartless, travel to the city's outer wall (return to the area where you first arrived in the world and travel through the large archway into the desert). Save your progress at the nearby save station and allow the carpet to take you to the desert.
Sora finds
Unlocking the Way
NEW HEARTLESS: Bandit, Barrel Spider, Fat Bandit
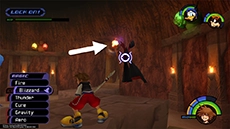
In order to reach Jafar, you must find and Release three small locks found on walls in the following areas:
| Area | Location | Screenshot |
|---|---|---|
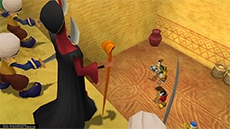
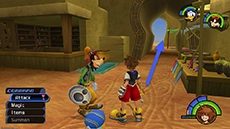
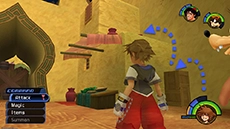
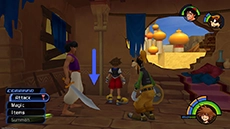
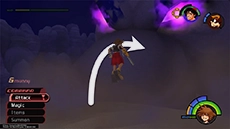
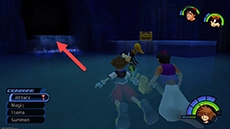
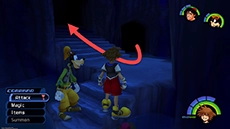
| Alley | On a ledge near the wooden awnings, across from the entrance to Plaza. |  |
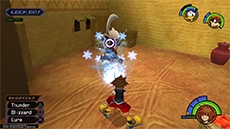
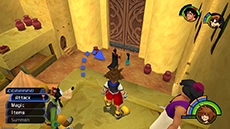
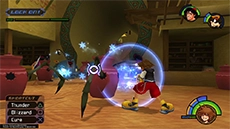
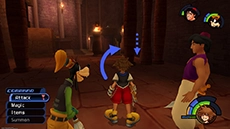
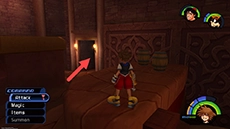
| Aladdin's House | Move the dresser along the back wall to reveal it. | 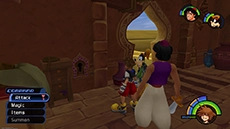 |
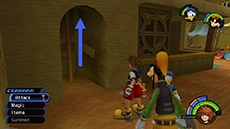
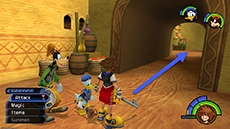
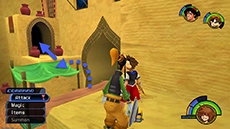
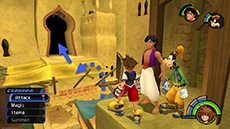
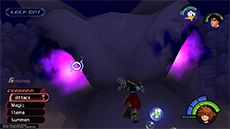
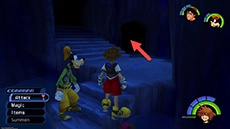
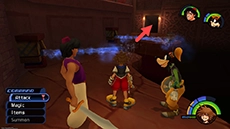
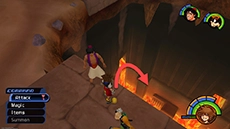
| Bazaar | On a high ledge across from the entrance to Main Street. You'll find the passage to the Bazaar on a high platform in the far corner of Main Street - jump from the canopies next to Aladdin's House to reach it. | 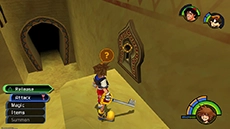 |
After releasing all three locks, return to Aladdin's house and save your progress. Exit the house using the pole to the left of the stairs overlooking the palace; adjust your camera to view the canopies and you will see a passage to the Palace Gates on the ledge across the way. Enter through this passage, equip curative items as needed, and jump down to Jafar.
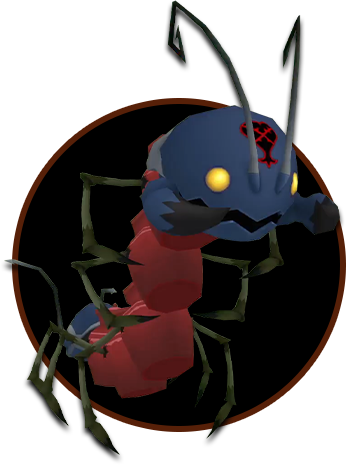 |
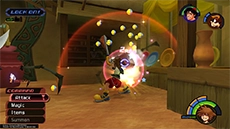
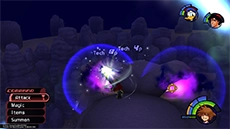
Pot CentipedePot Centipede |
 |
|
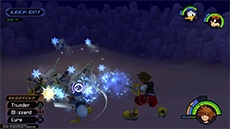
HP: 600 EXP: 250 DIFFICULTY: It's recommended to have Aladdin in your party for his high attack power; Donald is nice to have in the party for his Cure magic, but be sure to configure his combat settings in the Customize menu. The Pot Centipede is vulnerable to attacks at its head and tail, but it's preferred to focus your attacks on its head; the tail piece has two swingers that can damage you on contact. As the centipede moves around, Pot Spiders will jump down and connect together to make its mid-section. Landing a combo finisher on its head or tail will cause it to break apart and send Pot Spiders out to attack independently. A well-positioned Blizzard spell can be very effective in damaging many Pot Spiders at once. 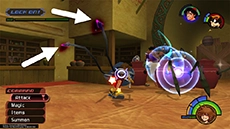

After the centipede breaks apart, the antennae on its head will glow blue; it will use these to strike out in front with a sweeping motion or spin attack. Use your Dodge Roll to distance yourself from the antennae until they stop glowing, then move in to attack with ground combos. The head piece can also attack with its pincers; you can strike them at the right time for Tech Points, or dodge roll away to safety. Pot Spiders will try to dive bomb and charge at you while the centipede is broken apart, so keep an eye out for incoming attacks when striking the centipede's head. 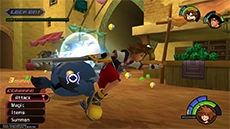

When the Pot Centipede recombines its parts, it will sometimes start moving to another area of Agrabah; you can choose to remain in the previous area to defeat all remaining Pot Spiders if you wish. If you're quick enough, you can position yourself in between the centipede's head and tail as it moves between areas and strike by repeatedly performing a small jump and quick air combo. 

REWARD: Ray of Light |
||


To the Desert
Before heading to the desert, return to Aladdin's house to save your progress and equip curative items. If you feel a bit under-levelled after that fight with the Parasite Cage, you can travel between the areas in Agrabah to defeat Heartless and gain EXP. When you are ready to proceed, return to the desert through the exit in the plaza and approach the large mound of sand.
 |
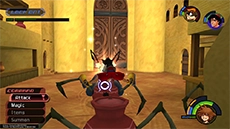
Cave of Wonders GuardianCave of Wonders Guardian |
|
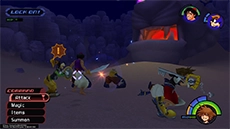
HP: 380 EXP: 400 DIFFICULTY: It's recommended to have Aladdin in your party for his high attack power; Donald is nice to have in the party for his Cure magic, but be sure to configure his combat settings in the Customize menu. The Cave of Wonders Guardian will typically start by sending out lasers from its eyes that track a party member. You can send these back for damage using the Guard ability, or use Dodge Roll to avoid them. When the cave dips its nose into the sand, use this opportunity to jump onto the nose and remain there until it rises back up. 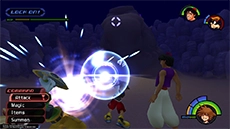
The Cave of Wonders Guardian is only vulnerable to damage at its eyes. Lock on to an eye and strike with complete ground combos, but be careful not to fall off of its nose. Switching your lock-on to the other eye in the middle of your combo can help you stay on the nose longer. Refrain from moving the left analog stick while the cave sways from side to side. The cave will periodically spit out Heartless; you can send your party members to attack the lesser Heartless on the ground by locking on to them and pressing the 
Casting Aero will boost your defense during this fight and it's strongly recommended. If you fall off of the nose at any time, dodge roll to either side of the cave to avoid taking damage. Always be aware of your HP during this battle; the Bandits and Air Soldiers have powerful attacks that can still reach you while you're on top of the cave, so be on the lookout for them.
REWARD: None |
||

 button twice.
Open the Lamp Chamber
Enter the Cave of Wonders and drop down into the darkness on your immediate right to reach the Relic Chamber. Make your way through the Dark Chamber and Silent Chamber to reach the Hidden Room. When you reach the Hidden Room, climb out of the water and onto the platform, then jump at the stone support column and strike it with the Keyblade.

In order to interact with far-away statues in the underground chambers, Aladdin must be in your party; Abu will jump to the statue in order to activate it.
The column should collapse, allowing you access to the Lamp Chamber through the passageways above. Return to the Silent Chamber by the way you came and ascend the stairs to return to the upper levels of the cave. Travel through the lit passages until you reach the Treasure Room. Save your progress, equip curative items, and enter the Lamp Chamber.
 |
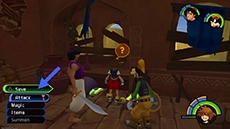
JafarJafar |
|
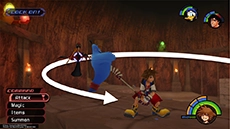
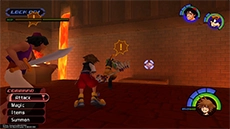
HP: 500 EXP: 600 DIFFICULTY: Jafar will float in a wide circle around the arena; you will need to jump from one of the three stone platforms along the walls and strike him with air combos. As you approach Jafar, run to the sides to avoid his beam attack - it's faster than you think! You'll typically hear him say an incantation that ends in a hiss before sending out the beam. Jafar can also send out a shockwave from beneath his staff; jump at the right time to avoid it, then follow up with an air combo. 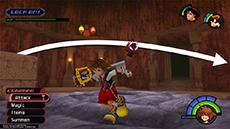
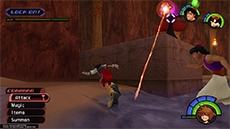
Genie will move slowly toward Sora or another party member and swing out with his fists. Position your camera so that you keep track of where he is. If you are hit by Genie, he will release HP and munny orbs that you can pick up. After taking hits from several combos, Jafar will disapparate into a glowing ball and move quickly across the arena; keep locked onto him to follow his movements. When he reappears, there's a very short window where you can stagger him before he moves away, but you may find it easier to wait on a neighboring platform and intercept Jafar as he floats toward you. 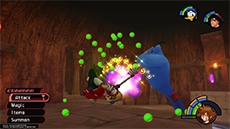

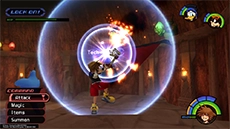
Using magic on Jafar will sometimes cause him to create a barrier, and he will often close in to attack you at ground level at this point. You can use this to your advantage by guarding against his attack and getting a few extra hits on him. Jafar can also light his staff on fire and approach you while swinging it; you can attack with an air combo to interrupt him before he swings, or keep your distance and close in to attack after he swings. 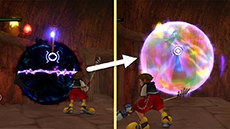
REWARD: Sora learns the magic spell Blizzara |
||


After defeating Jafar, you can exit the lamp chamber and save your progress in the Treasure Room if you want to. When you're ready to proceed, approach Jasmine at the far end of the Lamp Chamber and jump down into the lower chamber to face Jafar once more.
 |
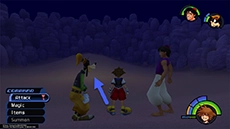
Jafar GenieJafar Genie |
|
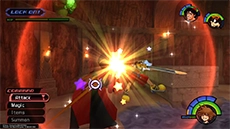
HP: 750 EXP: 730 DIFFICULTY: In this fight, you will need to attack the lamp held by Iago while keeping an eye out for Jafar's attacks. Lock on to the lamp, then jump and strike with air combos. You should also send your party members to attack the lamp by pressing the 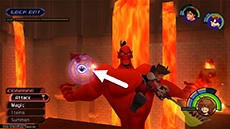
Jafar likes to pick up and throw large lava rocks at you; these can be deflected with Guard, or you can dodge roll away from them. If you stay too close to Jafar, he will swipe with his arm or strike down with his fist; dodge roll away to avoid these attacks. You can also strike Jafar's arm/hand while he attacks like this to stagger him, but watch out for his laser eyes attack that he follows up with (dodge roll to the sides to avoid it). 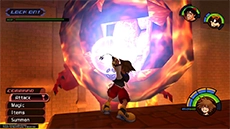
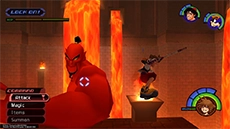
The lamp is invulnerable to magic attacks, but you can cast your new Blizzara spell directly on Jafar to do a bit of damage. The smaller platforms will move up/down or in/out as you chase down Iago, so try to anticipate where to jump next. Sometimes it's best to wait for Iago to fly across the center platform before attacking. Iago will eventually drop the lamp onto one of the far platforms for a short period of time; take this opportunity to land as many hits on the lamp as possible (he will drop HP and MP orbs as you land combo finishers!). 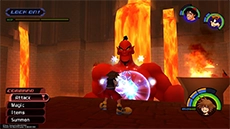

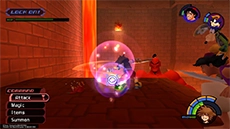
REWARD: Sora learns the magic spell Fira, Ansem's Report 1 |
||
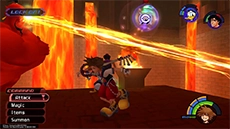
Escape the Cave of Wonders
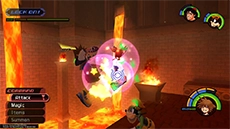
After sealing Jafar in his lamp, Aladdin and Sora must escape the Cave of Wonders while riding the magic carpet. Use  to move the carpet left and right. You can avoid most (if not all) of the falling rocks by holding left throughout the first section of the escape route; you can also press
  to strike them, but your timing must be precise. In the latter portions of the escape, you can avoid the pillars of fire by pressing
  to perform an evasive maneuver just before you make impact.


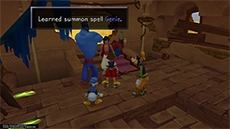
A New Ally and Ability
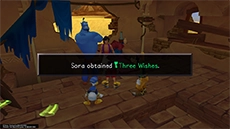
Upon escaping the Cave of Wonders, Aladdin uses his last wish to free Genie, who agrees to go with Sora as a summon. Aladdin rewards Sora with the Three Wishes keychain, and the party gains the ability to perform Green Trinities. You can return to the gummi ship through any save station at this time.
You can return to Traverse Town to access the Synthesis Room, return Torn Page #1 to the Hundred Acre Wood (if you picked it up in Agrabah), and acquire the Bambi summon.